Schlieren Photography - How Does It Work?
( Back to my Schlieren Photography Page )
So how does Schlieren photography make pictures like the above?
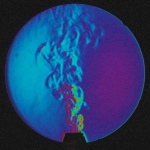
The phenomena you are seeing is the difference in air density. When a gas is heated it expands, and when it cools it contracts. As you might remember from high school physics, when light passes through materials with different densities, it refracts.
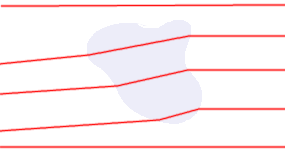
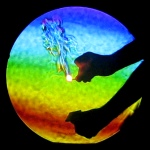
We tend to think of the air as uniform because we can't see the tiny changes all around us. But in reality the air is constantly moving and being disturbed by small heat sources. Even your body is causing the air to circulate upward around you.
There are several ways of making a Schlieren system. The most common are single mirror and
the z-style. I will be using the single mirror style as you only need one mirror instead of a
matching pair and lenses and a lot more difficulty in setting it up that the z-style requires.
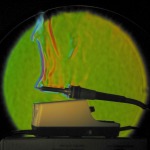
Here is an example of my setup. I'll be using a spherical mirror in my examples, but often a
parabolic is used due to their easy availability.
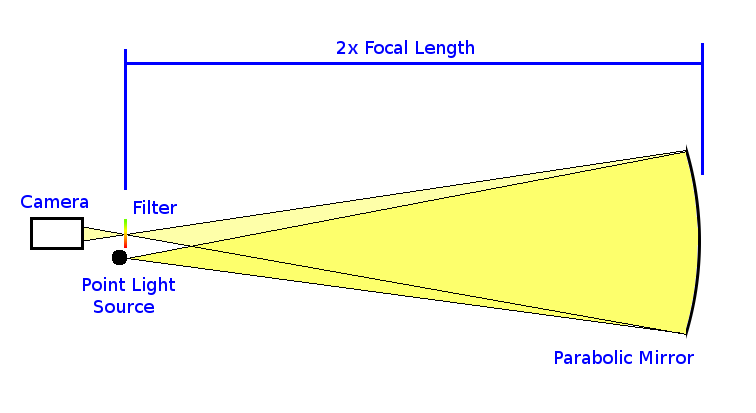
So what is going on here? Every concave mirror has what is called it's "focal distance". You
want your equipment placed exactly twice this so that light coming from the source will bounce
right back to it.
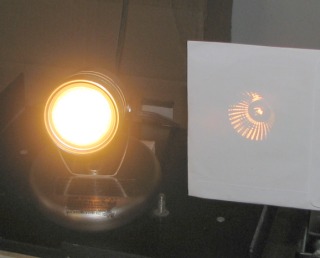
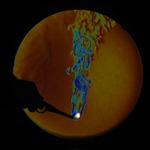
I did that here, and though it's too bright to see the bulb and focusing mirror inside the lamp,. you can clearly make the details out in the projected image.
In Schlieren photography, this light source will be as tiny as you can make it, and so the projected image will be a thin line or a tiny dot.
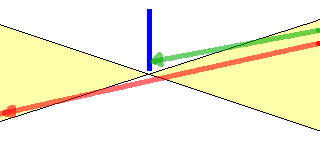
Now imagine that patch of air in front of the mirror. Any light passing through it will be refracted, but only a tiny amount, normally invisible. But because all the light is aimed at such a tiny spot, even the minor refraction will cause the ray to miss.
If you were to block half of the image right at the projection point you will now produce an image where light refracted in one direction is blocked, but is passed and added to the image in the other direction. This is what causes the light and dark patterns in the final image. A color slide will do the same, coloring light that misses the target.
Hopefully you have an idea of how it works now. The setup consists of only four elements.
1. A concave mirror with a long focal distance. The longer the focal length the better image you will get. I would not try anything less than 3 to 4 feet as it will not give the light enough time to separate very far and will give very weak effects. The mirror must be optical grade like from a telescope. A bathroom mirror simply is way too uneven to work. You want the biggest mirror you can find. In general this will be a commonly available 6" to 8" mirror which you can find on eBay for $50 to $100 or cheaper if you are lucky. Otherwise check out Anchor Optics for 6" sized mirrors for under $100.
You want spherical rather than parabolic, but parabolic will still work, it just will produce less even lighting across the image. You also want something with a long focal distance. The distance between your mirror and the camera will be twice this, so keep your space requirements in mind.
2. A camera. This can be tricky for larger mirrors, but for a small 6" one pretty much any digital camera or video camera will do. You will want to be able to zoom in until the mirror fills the full frame if possible. The best case is a DSLR with a fixed telephoto lens. See my Problems With Digital Cameras page for camera advice.
3. A point light source. You want the brightest, smallest light you can make. I know these are mutually exclusive but thems the breaks! There are several methods. One is a bright light, a lens and some fiber optic. Another uses an LED sanded down and some silver tape with a pinhole. I have a page on How To Make a Point Light Source that outlines a few methods.
4. A knifes edge or color filter. You need something to partially block or color the light at the focal point. I made some color patterns and had slides made from them and that seems to have the best effect. See below for the image I printed out and used in the later pictures. For a knifes edge, a razor blade will work. A razor is needed because if there is any thickness it will scatter the light and produce flaring.
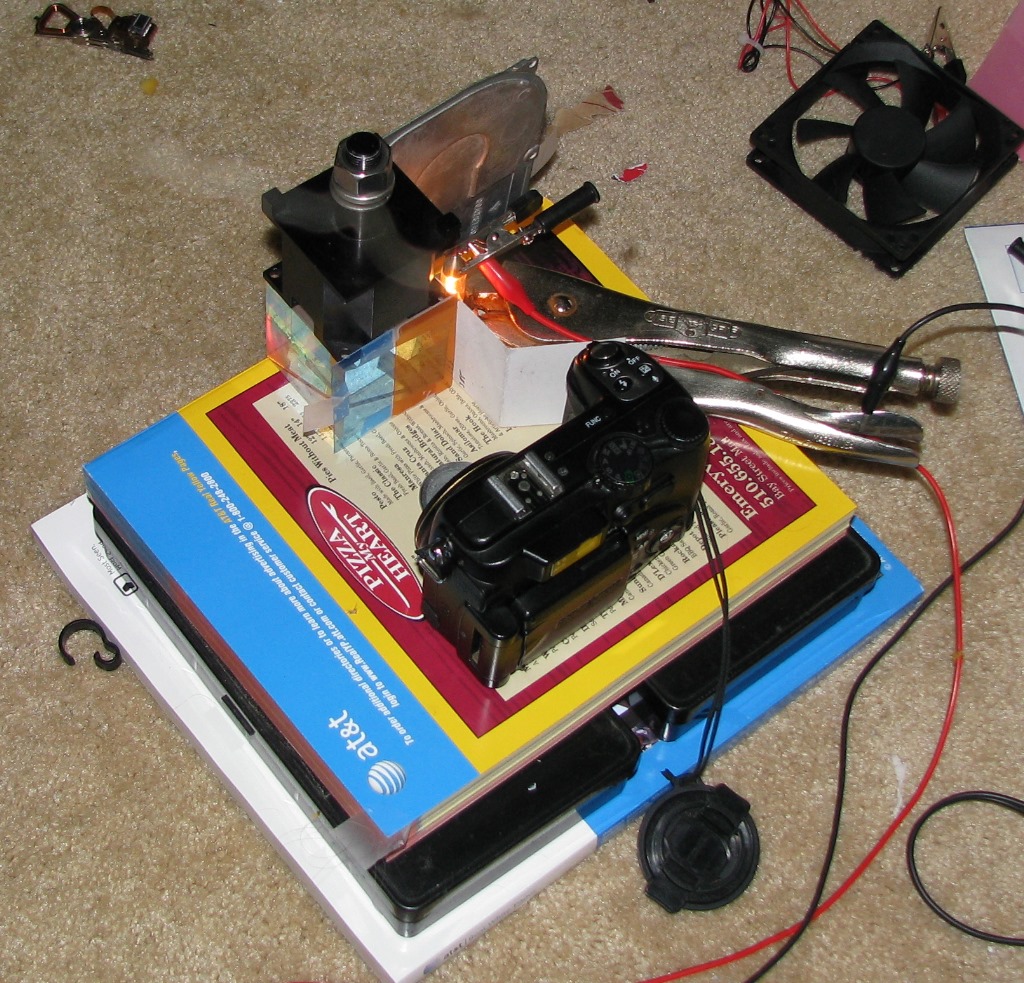
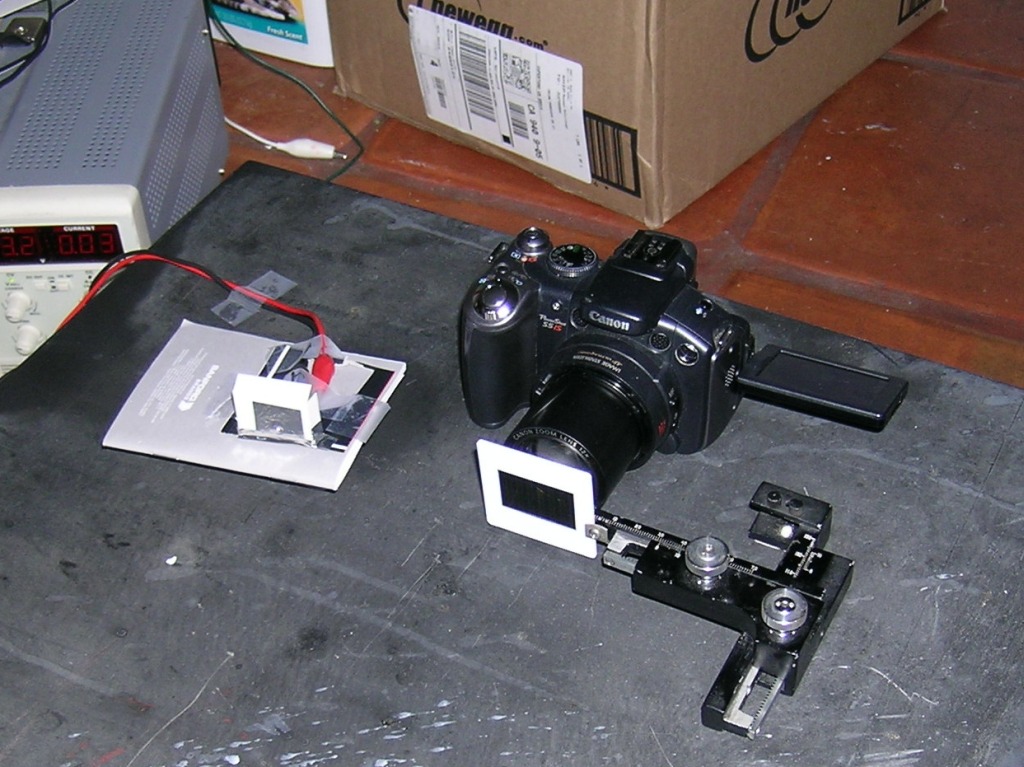
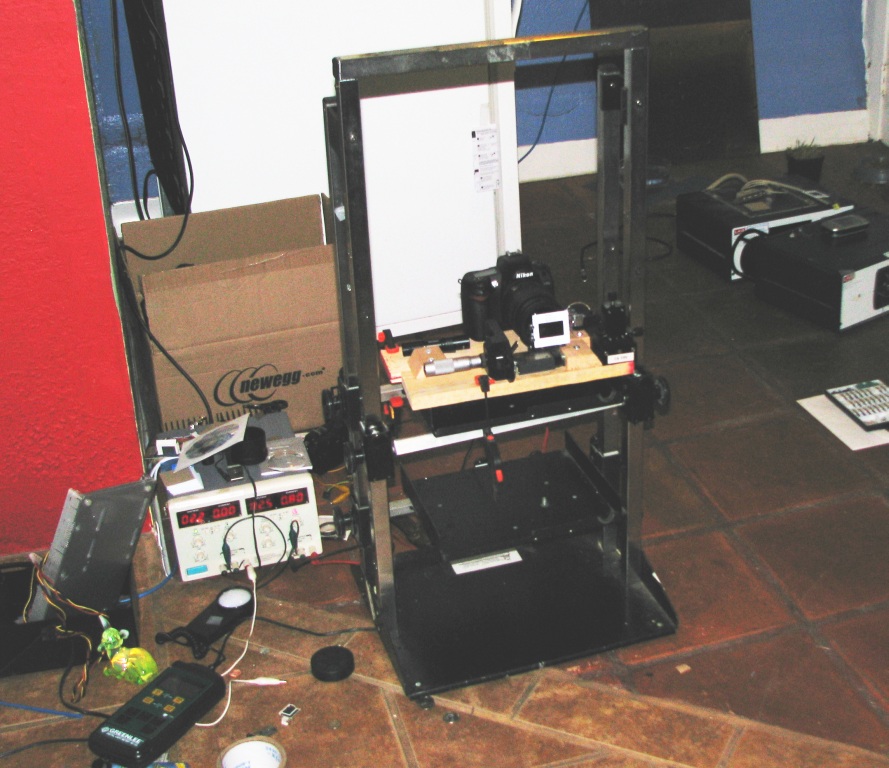
The setup is pretty simple once you get the hang of it, but I'll give the key points here. Many other web pages give some setup help as well, and assume you all ready know how it all works. Below are some images of various setups I have made. The first one is from last year using a beam-splitter prism to get better alignment. Too touchy with reflections. The next two are as simple as it gets. An LED light source through a pinhole, a camera and a color filter. The last is my current setup on an adjustable platform and various x-y stages and screws for adjusting things. The point is, use whatever works. If you have access to a physics lab, go for it. If you need to use phone books and CDs to get things positioned right, it's the results that count. The last links to the slide image I have been using.


All of this has to be on a steady, stable surface. Use your basement if you can. Any vibrations will cause the system to go out of whack. Carpets and pads can be a problem because the weight of things will cause it to slowly settle, putting everything out of alignment. It's easiest to tape the color filter to the end of the camera lens, and tape the light source to it as well. This will minimize the movement. Secure the camera with it's mounting screw if you can. You will need to work in near darkness. To find the projection point you can use a flashlight to shine on the mirror and move it back and forth until you get a clear image. This is where you should set up the camera. You can move the camera into position now, and adjust it until you focus the point light source right in the center of the lens. It can help to put some paper over the lens here to find the spot. Now you can look through the viewfinder and point the camera right at the center of the mirror. This will be the hardest part, you need to move the camera back and forth and up and down little by little until the entire mirror is lit up evenly. This takes a lot of practice to get a feel for it.
Links...
Wikipedia of course.
Andrew Davidhazy's Schlieren
Photography Principles
Schlieren
Optics from Harvard.
J. Kim Vandiver's Photo
Gallery
The book Schlieren and
Shadowgraph Techniques by Gary S. Settles.
Back to my Schlieren Photography Page.